

搜索到
108
篇与
net
的结果
-
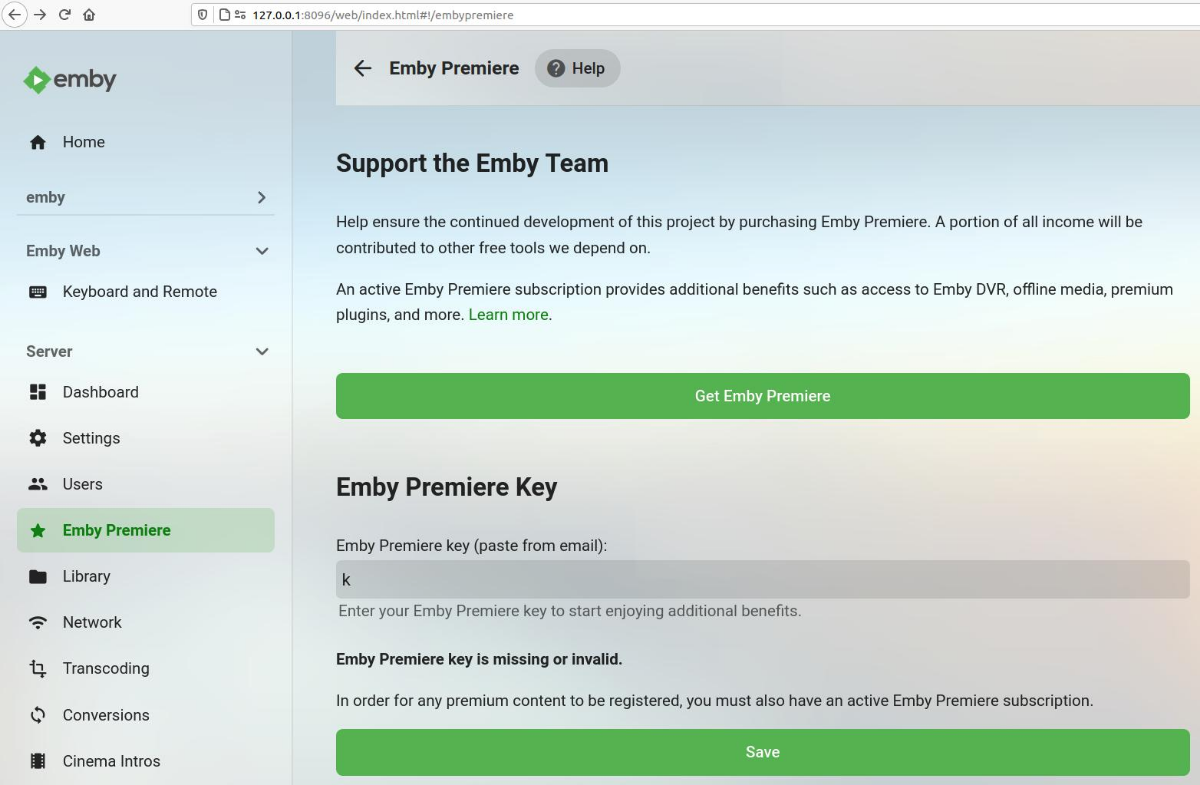
 破解emby-server 前言现在很多服务的正常运行都依赖某个中心服务器,如果服务器升级或出现故障或者公司跑路,付费用户将无法继续正常使用。emby也是如此,程序要访问mb3admin.com确认你是付费用户才能使用更多的功能,不管你的个人网络还是他们服务器出问题,都将不能使用付费功能。网络上有一些解决方案,但大都需要搭建一个nginx伪装站点,生成ssl证书,emby服务器上添加证书并且修改hosts文件,客户端也需要修改hosts或者重定向mb3admin.com到伪站……我认为这样破解太过复杂了,用别人的伪站又担心不稳定。所以,就有了今天的尝试,修改emby程序,让其在不设置伪站的情况下也能使用最基本的是付费功能。破解过程需要用到下面两个工具:js-beautify dnSpy emby-server在Linux系统中安装于/opt/emby-server/,把此文件夹复制到hack-emby目录,并在此目录执行下面的脚本,美化javascript代码,以方便阅读。#!/bin/bash for f in $(find emby-server/ -name "*.js") do echo "$f" js-beautify "$f" > tmp mv tmp "$f" done在浏览器打开emby,在Emby Premiere页面随便输入一个key按保存后提示Emby Premiere key is missing or invalid.搜索定义并调用这个字符串的位置,发现仅在 system/dashboard-ui/embypremiere/embypremiere.html 中有调用这个字符串,同目录有个 embypremiere.js ,根据 MediaBrowser.Model.dll 中的某些函数返回值,执行相关的判断。修改 MediaBrowser.Model.dll 中的 get_IsMBSupporter 和 get_SupporterKey 的返回值后不再提示这个错误,不过也不像付费用户一样显示。还需要修改 emby-server/system/dashboard-ui/embypremiere/embypremiere.js 中的load(page)函数,去除访问 mb3admin.com 相关的代码,并且硬编码返回给付费用户的json数据才能正常显示。function load(page) { var apiClient; loading.show(), (apiClient = ApiClient).getJSON(apiClient.getUrl("Plugins/SecurityInfo")).then(function(info) { var key, postData; page.querySelector("#txtSupporterKey").value = info.SupporterKey || "", page.querySelector("#txtSupporterKey").classList.remove("invalidEntry"), page.querySelector(".notSupporter").classList.add("hide") var statusInfo = {"deviceStatus":"0","planType":"Lifetime","subscriptions":{}}; var statusLine, indicator = page.querySelector("#status-indicator .listItemIcon"), extendedPlans = page.querySelector("#extended-plans"); switch (extendedPlans.innerHTML = globalize.translate("MessagePremiereExtendedPlans", '<a is="emby-linkbutton" class="button-link" href="https://emby.media/premiere-ext.html" target="_blank">', "</a>"), statusInfo.deviceStatus) { default: statusLine = globalize.translate("MessagePremiereStatusGood", statusInfo.planType), indicator.classList.remove("expiredBackground"), indicator.classList.remove("nearExpiredBackground"), indicator.innerHTML = "", extendedPlans.classList.add("hide") } page.querySelector("#premiere-status").innerHTML = statusLine; var sub, subsElement = page.querySelector("#premiere-subs"); statusInfo.subscriptions && 0 < statusInfo.subscriptions.length ? (page.querySelector("#premiere-subs-content").innerHTML = (subs = statusInfo.subscriptions, key = info.SupporterKey, subs.map(function(item) { var itemHtml = "", makeLink = item.autoRenew && "Stripe" === item.store, tagName = makeLink ? "button" : "div"; return itemHtml += ("button" == tagName ? '<button type="button"' : "<div") + ' class="listItem listItem-button listItem-noborder' + (makeLink ? " lnkSubscription" : "") + '" data-feature="' + item.feature + '" data-key="' + key + '">', itemHtml += '<i class="listItemIcon md-icon">dvr</i>', itemHtml += '<div class="listItemBody two-line">', itemHtml += '<div class="listItemBodyText">', itemHtml += globalize.translate("ListItemPremiereSub", item.planType, item.expDate, item.store), itemHtml += "</div>", itemHtml += '<div class="listItemBodyText listItemBodyText-secondary">', itemHtml += globalize.translate("Stripe" === item.store ? item.autoRenew ? "LabelClickToCancel" : "LabelAlreadyCancelled" : "LabelCancelInfo", item.store), itemHtml += "</div>", itemHtml += "</div>", itemHtml += "</" + tagName + ">" })), (sub = page.querySelector(".lnkSubscription")) && sub.addEventListener("click", cancelSub), subsElement.classList.remove("hide")) : subsElement.classList.add("hide"), page.querySelector(".isSupporter").classList.remove("hide") //var subs, key }), loading.hide() }这里并不是最重要的,也许恰恰是最不重要的,因为我修改相关的代码后,Dashboard页面并没有显示徽章,不能使用付费主题,不能看live tv,右上角的升级会员按钮没有消失。这个程序以前是开源的,后来闭源后越来越不好破解了!(不过javascript和C#跟开源没啥区别)显示徽章Dashboard中徽章位于emby-server/system/dashboard-ui/css/images/supporter/supporterbadge.png,脚本system/dashboard-ui/dashboard/dashboard.js中的renderSupporterIcon函数使用了这个图标,调用这个函数的代码段为:function() { var apiClient = window.ApiClient; return apiClient ? connectionManager.getRegistrationInfo("themes", apiClient, { viewOnly: !0 }).then(function(result) { return { IsMBSupporter: !0 } }, function() { return { IsMBSupporter: !1 } }) : Promise.reject() }().then(function(pluginSecurityInfo) { DashboardPage.renderSupporterIcon(page, pluginSecurityInfo); var html, supporterPromotionElem = page.querySelector(".supporterPromotion"), isSupporter = pluginSecurityInfo.IsMBSupporter;只要把IsMBSupporter: !1改为 IsMBSupporter: !0 就可以显示徽章了。修改 emby-server/system/dashboard-ui/bower_components/emby-apiclient/connectionmanager.js 的getRegistrationInfo应该会更好,因为多处代码都调用了这个函数!key: "getRegistrationInfo", value: function(feature, apiClient, options) { var params = { serverId: apiClient.serverId(), deviceId: this.deviceId(), deviceName: this.deviceName(), appName: this.appName(), appVersion: this.appVersion(), embyUserName: "" }; (options = options || {}).viewOnly && (params.viewOnly = options.viewOnly); var cacheKey = getCacheKey(feature, apiClient, options), regInfo = JSON.parse(this.appStorage.getItem(cacheKey) || "{}"), timeSinceLastValidation = Date.now() - (regInfo.lastValidDate || 0); if (timeSinceLastValidation <= 864e5) return console.log("getRegistrationInfo returning cached info"), Promise.resolve(); var regCacheValid = timeSinceLastValidation <= 864e5 * (regInfo.cacheExpirationDays || 7); params.embyUserName = apiClient.getCurrentUserName(); var currentUserId = apiClient.getCurrentUserId(); if (currentUserId && "81f53802ea0247ad80618f55d9b4ec3c" === currentUserId.toLowerCase() && "21585256623b4beeb26d5d3b09dec0ac" === params.serverId.toLowerCase()) return Promise.reject(); var appStorage = this.appStorage, getRegPromise = ajax({ url: "https://mb3admin.com/admin/service/registration/validateDevice?" + paramsToString(params), type: "POST", dataType: "json" }).then(function(response) { return appStorage.setItem(cacheKey, JSON.stringify({ lastValidDate: Date.now(), deviceId: params.deviceId, cacheExpirationDays: response.cacheExpirationDays })), Promise.resolve() }, function(response) { var status = (response || {}).status; return console.log("getRegistrationInfo response: " + status), 403 === status ? Promise.reject("overlimit") : status && status < 500 ? Promise.reject() : function(err) { if (console.log("getRegistrationInfo failed: " + err), regCacheValid) return console.log("getRegistrationInfo returning cached info"), Promise.resolve(); throw err }(response) }); return regCacheValid ? (console.log("getRegistrationInfo returning cached info"), Promise.resolve()) : getRegPromise }把 if (timeSinceLastValidation <= 864e5) return console.log("getRegistrationInfo returning cached info"), Promise.resolve(); 中的 timeSinceLastValidation <= 864e5 替换为true,确保始终返回本地缓存中的数据,而不再需要找服务器验证。不过程序可能为了防止这个js文件被修改,在 emby-server/system/dashboard-ui/app.js 中有这么一段代码: define("connectionManagerFactory", [], getDynamicImport("./bower_components/emby-apiclient/connectionmanager.js"))运行时从emby-server/system/Emby.Web.dll中动态导入这个js文件,而不是使用 emby-server/system/dashboard-ui/bower_components/emby-apiclient/connectionmanager.js ,使用dnSpy的Hex Editor修改这几个字节就可以了。破解会员功能上面两个并没那么重要,上传、下载、电视直播和dvr这类功能才是更加实用的,这些都跟validateFeature有关系。同样,这个函数不仅存在于system/dashboard-ui/modules/registrationservices/registrationservices.js,在Emby.Web.dll中也有备份,我们要修改后者才能生效。{ validateFeature: function(feature, options) { return options = options || {}, console.log("validateFeature: " + feature), iapManager.isUnlockedByDefault(feature, options).then(function() { return showPeriodicMessageIfNeeded(feature) }, function() { var unlockableFeatureCacheKey = "featurepurchased-" + feature; if ("1" === appSettings.get(unlockableFeatureCacheKey)) return showPeriodicMessageIfNeeded(feature); var unlockableProduct = iapManager.getProductInfo(feature); if (unlockableProduct) { var unlockableCacheKey = "productpurchased-" + unlockableProduct.id; if (unlockableProduct.owned) return appSettings.set(unlockableFeatureCacheKey, "1"), appSettings.set(unlockableCacheKey, "1"), showPeriodicMessageIfNeeded(feature); if ("1" === appSettings.get(unlockableCacheKey)) return showPeriodicMessageIfNeeded(feature) } var unlockableProductInfo = unlockableProduct ? { enableAppUnlock: !0, id: unlockableProduct.id, price: unlockableProduct.price, feature: feature } : null; return iapManager.getSubscriptionOptions().then(function(subscriptionOptions) { if (0 < subscriptionOptions.filter(function(p) { return p.owned }).length) return Promise.resolve(); var registrationOptions = { viewOnly: options.viewOnly }; return connectionManager.getRegistrationInfo(iapManager.getAdminFeatureName(feature), connectionManager.currentApiClient(), registrationOptions).catch(function(errorResult) { return !1 === options.showDialog ? Promise.reject() : ("overlimit" === errorResult && (alertPromise = alertText("Your Emby Premiere device limit has been exceeded. Please check with the owner of your Emby Server and have them contact Emby support at support@emby.media if necessary.").catch(function() { return Promise.resolve() })), (alertPromise = alertPromise || Promise.resolve()).then(function() { var dialogOptions = { title: globalize.translate("HeaderUnlockFeature"), feature: feature }; return currentValidatingFeature = feature, showInAppPurchaseInfo(subscriptionOptions, unlockableProductInfo, dialogOptions) })); var alertPromise }) }) }) }, showPremiereInfo: showPremiereInfo }修改这个函数的返回值,并保存。替换掉系统中相关的文件,刷新浏览器缓存,就可以使用会员的大部分功能了。上图是破解前,即使正版程序,在局域网无法访问mb3admin.com时,可能也无法使用付费功能。下图为破解后,emby-server不再访问mb3admin.com而是直接返回缓存中/硬编码在dll和js中的数据。致敬作者:转载自https://bbs.pediy.com/thread-263534.htm
 -
docker运行的所有服务无法远程访问 问题描述{alert type="info"} 在新安装的 ubuntu server 22.0.4 系统过程中本来勾选了安装 docker stable 版本,但实际上进入系统后却没有安装 docker 。只能通过 sudo apt-get install -y docker.io 安装。 安装成功后安装了 mysql 8.0.26 镜像容器和 gitlab 镜像容器,本地使用 telnet 127.0.0.1 3306 是通的,且进入容器内用 root 账户登录也正常,说明容器服务是正常的。但是局域网内其他设备却无法连通 mysql 服务。并非本地主机或者局域网远程主机防火墙阻挡,因为 22 端口是可以正常访问的,且本地防火墙状态全关。 最后解决问题了,知道问题是docker的虚拟网关存在问题。{/alert}一、网上参考解决方案原因:docker网卡地址冲突sudo apt-get install -y bridge-utils设置网卡信息sudo service docker stop sudo ip link set dev docker0 down sudo brctl delbr docker0 sudo iptables -t nat -F POSTROUTING sudo brctl addbr docker0 sudo ip addr add 172.17.0.1/24 dev docker0 sudo ip link set dev docker0 up 二、实际解决问题修改 daemon.json 文件centos上安装后有此文件,但是 ubuntu 上需要自己创建文件。vi /etc/docker/daemon.json示例: { "registry-mirrors": [ "https://cqiunwxe.mirror.aliyuncs.com", "https://registry.docker-cn.com", "http://hub-mirror.c.163.com", "https://docker.mirrors.ustc.edu.cn", "https://cr.console.aliyun.com", "https://mirror.ccs.tencentyun.com" ], "bip": "172.16.10.1/24" }重载配置并重启docker服务sudo systemctl daemon-reload && sudo systemctl restart docker
-
ubuntu安装、使用docker方法 一、安装1、查看内核uname -r2、更新包sudo apt-get update3、没有docker旧版本,忽略这一步。如果有则需要卸载旧的版本,主要为了防止新旧版本冲突sudo apt-get remove docker docker-engine docker.io containerd runc4、为了防止 apt 源使用 HTTPS 以确保软件下载过程中不被篡改。我们需要添加使用 HTTPS 传输的软件包及 CA 证书sudo apt-get install apt-transport-https ca-certificates curl gnupg lsb-release5、确认下载软件包的合法性,需要添加软件源的 GPG 密钥,但因网络问题设置docker源改为国内源(阿里)curl -fsSL https://mirrors.aliyun.com/docker-ce/linux/ubuntu/gpg | sudo gpg --dearmor -o /usr/share/keyrings/docker-archive-keyring.gpg或curl -fsSL http://mirrors.aliyun.com/docker-ce/linux/ubuntu/gpg | sudo apt-key add -6、向 source.list 中添加 Docker CE 软件源sudo add-apt-repository "deb [arch=amd64] http://mirrors.aliyun.com/docker-ce/linux/ubuntu $(lsb_release -cs) stable"或使用https://mirrors.ustc.edu.cn源(失效)sudo add-apt-repository "deb [arch=armhf] https://mirrors.ustc.edu.cn/docker-ce/linux/raspbian $(lsb_release -cs) stable"7、安装sudo apt-get -y install docker.io或sudo apt-get install docker-ce docker-ce-cli containerd.io启动dockersudo systemctl start dockerdocker换源修改 /etc/docker/daemon.json (如果该文件不存在,则创建){ "registry-mirrors": [ "https://hub-mirror.c.163.com" ] }sudo systemctl daemon-reload && sudo systemctl restart docker添加用户到docker用户组
-
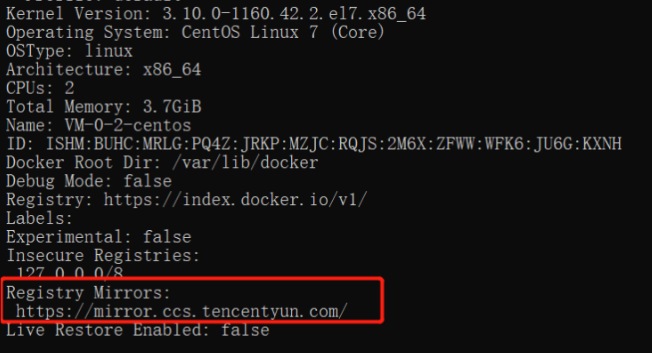
docker更换国内镜像源 通过配置文件启动Docker,修改 /etc/docker/daemon.json 文件并添加上 registry-mirrors 键值。sudo vim /etc/docker/daemon.json{ "registry-mirrors" : [ "https://registry.docker-cn.com", "http://hub-mirror.c.163.com", "https://docker.mirrors.ustc.edu.cn", "https://cr.console.aliyun.com", "https://mirror.ccs.tencentyun.com" ] }sudo service docker restart sudo systemctl daemon-reload #重载配置 sudo systemctl restart docker #重启docker查看配置是否成功:docker infoRegistry Mirrors:有截图中框起来的就说明配置成功。Docker中国区官方镜像:https://registry.docker-cn.com网易:http://hub-mirror.c.163.comustc:https://docker.mirrors.ustc.edu.cn中国科技大学:https://docker.mirrors.ustc.edu.cn阿里云:https://cr.console.aliyun.com/阿里云:https://<你的ID>.mirror.aliyuncs.com(打开此地址登录你的阿里云账号获取你的专属镜像源https://cr.console.aliyun.com/#/accelerator)腾讯云:https://mirror.ccs.tencentyun.com科大镜像:https://docker.mirrors.ustc.edu.cn/七牛云加速器:https://reg-mirror.qiniu.com
-
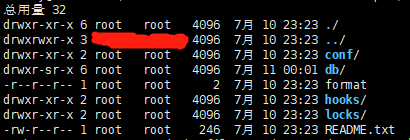
docker运行svn 一、安装命令docker run -d \ --restart=unless-stopped \ --name svn \ -v /home/path:/var/opt/svn \ -p 3690:3690 \ garethflowers/svn-server二、开放端口查看端口是否开启firewall-cmd --list-all开启端口firewall-cmd --add-port=3690/tcp --permanent重启防火墙firewall-cmd --reload三、初始化仓库docker exec -it svn /bin/shcd /var/opt/svn && svnadmin create repos && cd repos打开 conf 配置文件资源仓库配置,修改 svnserve.confanon-access = none # 匿名用户不可读写,也可设置为只读 read auth-access = write # 授权用户可写 password-db = passwd # 密码文件路径,相对于当前目录 authz-db = authz # 访问控制文件 realm = /var/opt/svn/repos # 认证命名空间,会在认证提示界面显示,并作为凭证缓存的关键字,可以写仓库名称比如svn### users have read-only access to the repository, while authenticated ### users have read and write access to the repository. # anon-access = read # auth-access = write anon-access = none auth-access = write ### The password-db option controls the location of the password ### database file. Unless you specify a path starting with a /, ### the file's location is relative to the directory containing ### this configuration file. ### If SASL is enabled (see below), this file will NOT be used. ### Uncomment the line below to use the default password file. password-db = passwd ### The authz-db option controls the location of the authorization ### rules for path-based access control. Unless you specify a path ### starting with a /, the file's location is relative to the ### directory containing this file. The specified path may be a ### repository relative URL (^/) or an absolute file:// URL to a text ### file in a Subversion repository. If you don't specify an authz-db, ### no path-based access control is done. ### Uncomment the line below to use the default authorization file. authz-db = authz ### The groups-db option controls the location of the file with the ### group definitions and allows maintaining groups separately from the ### authorization rules. The groups-db file is of the same format as the ### authz-db file and should contain a single [groups] section with the ### group definitions. If the option is enabled, the authz-db file cannot ### contain a [groups] section. Unless you specify a path starting with ### a /, the file's location is relative to the directory containing this ### file. The specified path may be a repository relative URL (^/) or an ### absolute file:// URL to a text file in a Subversion repository. ### This option is not being used by default. # groups-db = groups ### This option specifies the authentication realm of the repository. ### If two repositories have the same authentication realm, they should ### have the same password database, and vice versa. The default realm ### is repository's uuid. # realm = My First Repository realm = /var/opt/svn/repos ### The force-username-case option causes svnserve to case-normalize ### usernames before comparing them against the authorization rules in the ### authz-db file configured above. Valid values are "upper" (to upper- ### case the usernames), "lower" (to lowercase the usernames), and ### "none" (to compare usernames as-is without case conversion, which ### is the default behavior). # force-username-case = none ### The hooks-env options specifies a path to the hook script environment ### configuration file. This option overrides the per-repository default ### and can be used to configure the hook script environment for multiple ### repositories in a single file, if an absolute path is specified. ### Unless you specify an absolute path, the file's location is relative ### to the directory containing this file. # hooks-env = hooks-env [sasl] ### This option specifies whether you want to use the Cyrus SASL ### library for authentication. Default is false. ### Enabling this option requires svnserve to have been built with Cyrus ### SASL support; to check, run 'svnserve --version' and look for a line ### reading 'Cyrus SASL authentication is available.' # use-sasl = true ### These options specify the desired strength of the security layer ### that you want SASL to provide. 0 means no encryption, 1 means ### integrity-checking only, values larger than 1 are correlated ### to the effective key length for encryption (e.g. 128 means 128-bit ### encryption). The values below are the defaults. # min-encryption = 0 # max-encryption = 256四、创建用户修改 passwd 文件,创建用户### This file is an example password file for svnserve. ### Its format is similar to that of svnserve.conf. As shown in the ### example below it contains one section labelled [users]. ### The name and password for each user follow, one account per line. [users] # harry = harryssecret # sally = sallyssecret admin = 123456 zhangsan = 123456 lisi = 123456五、分配权限修改 authz 文件,创建用户### This file is an example authorization file for svnserve. ### Its format is identical to that of mod_authz_svn authorization ### files. ### As shown below each section defines authorizations for the path and ### (optional) repository specified by the section name. ### The authorizations follow. An authorization line can refer to: ### - a single user, ### - a group of users defined in a special [groups] section, ### - an alias defined in a special [aliases] section, ### - all authenticated users, using the '$authenticated' token, ### - only anonymous users, using the '$anonymous' token, ### - anyone, using the '*' wildcard. ### ### A match can be inverted by prefixing the rule with '~'. Rules can ### grant read ('r') access, read-write ('rw') access, or no access ### (''). [aliases] # joe = /C=XZ/ST=Dessert/L=Snake City/O=Snake Oil, Ltd./OU=Research Institute/CN=Joe Average [groups] # harry_and_sally = harry,sally # harry_sally_and_joe = harry,sally,&joe administrator = admin test = zhangsan dev = lisi # [/foo/bar] # harry = rw # &joe = r # * = # [repository:/baz/fuz] # @harry_and_sally = rw # * = r [/] @administrator = rw @test = r @dev = rw 六、导出和导入全部数据svnadmin dump /var/opt/svn/repos/ > /var/opt/svn/backup/fullsvn.baksvnadmin load /var/opt/svn/repos/ < /var/opt/svn/backup/fullsvn.bak


您的IP: